I have always wanted post more tutorials here. I tend to make a lot of one-of-a-kind things because when I come across something that inspires me, I study it to figure out how to make it, and then just start cutting, forgetting to document what I did.
Every store I go into has it’s own version of a reusable tote, from the grocery store to the book store to the pet store. Lots of people are making their own tote bags because most of those store versions are so generic, stiff and just kinda ugly. I got a boring black tote bag from a swimwear store last summer that I used as a model for my latest tote bag obsession.
I thought it would be fun to share my version of a girly tote bag. I used single pieces of fabrics, but you could do so much with this size, from stripes of jelly rolls strips to a patchwork block framed in linen fabric.
Materials
One half yard fabric for outside and one strap (additional fabric required if you want the straps to match)
One half yard fabric for lining and the second strap
Cutting
Cut two pieces 13 inches wide by 14 inches tall from the outside fabric and from the lining fabric.
Cut two strips of fabric 5 inches wide by 24 inches long for the strap.
Sewing the Bag Pieces
Lay the two outside fabrics right sides together and sew together with a 1/4-inch seam. Turn right side out.
Lay the two lining fabrics right sides together and sew together with a 1/4-inch seam, leaving a two-inch opening in the center bottom of the lining. Leave the lining inside out.
Straps
Fold one of the strap fabrics in half, wrong sides together and press. Open and fold raw edges toward center fold and press.
 Fold in half again so all raw edges are tucked inside, and press.
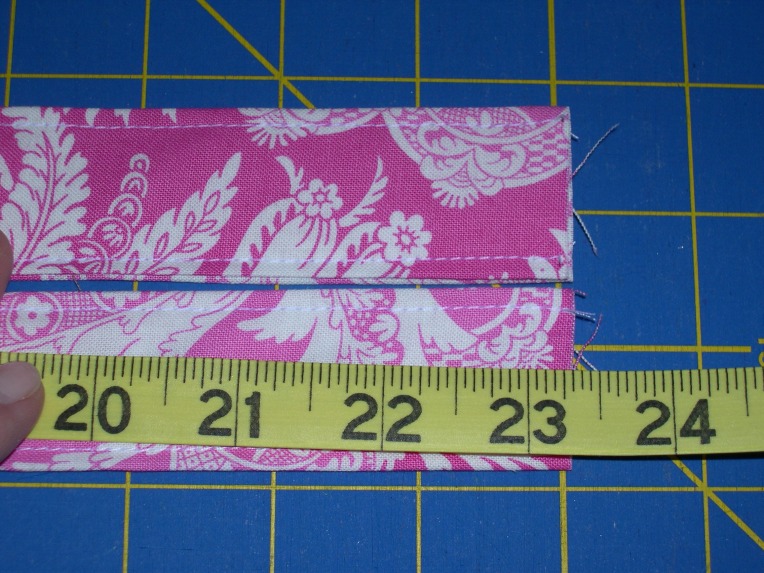
Top-stitch on each side, about 1/8-inch from folds. Measure the straps to gauge the length. Mine came to about 23 inches long, which was fine for me.
Attaching Straps
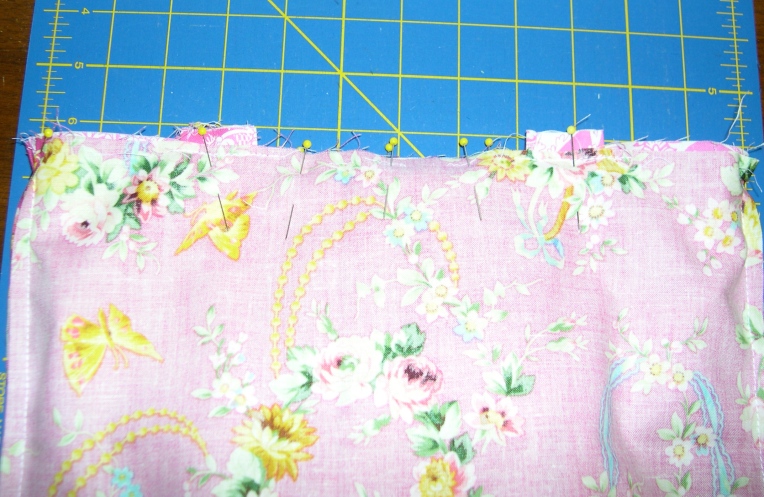
Measure 2.5 inches in from the left edge of the outside bag, and pin one end of the strap, leaving a 1/4-inch overhang. Do the same on the right side and pin the other end of that strap, leaving a 1/4-inch overhang, and pin, making sure the strap is not twisted. Baste in place using a 1/8-inch seam.
Optional: Making a Flat Bottom
To prepare the corners for a flat bottom, pinch a corner so the seams line up, making the corner look like a triangle. Measure 1 inch from one side of the triangle to the center seam, and draw a line all the way across. Stitch on that line, which will give you a 2-inch bottom.
Snip off the corner, leaving a 1/4 inch seam allowance. Repeat for the remaining corners.
Assembling the Bag
Insert the outside bag (which should be RSO) into the lining bag (which should be inside out), smoothing the layers together and making sure the handles are neatly tucked in between the two bags. Pin, pin, pin. Sew the two layers together with a 1/4-inch seam.
Pull the outside bag through that hole in the bottom of the lining fabric to pull the two bags right side out.
Smooth out the two bags so it looks like one long piece.
Tuck the lining inside the outside of the bag. Press along the top, and pin pin pin.
 Top stitch the top of the bag to hold the layers together and give it a nice finish. I switched to pink thread here, just for fun. Then I decided to add some pink rick-rack over that top stitching for that extra little touch.
Whipstitch the opening in the lining fabric closed.
Put your stuff inside and show it off!
 *****
*****
If you want to print the directions without the pictures (which can use up so much toner!),email me at tadawilhelm@hotmail.com and I will send you a shortened version. If I can figure out how to attach a link to a pdf, I will add that here.
EDIT: the shortened instructions are here, thanks to Sandi who shared the easy instructions for adding a pdf to this post!
Enjoy your stylish new tote!


Great Tutorial! A girl can never have too many bags…especially pretty totes like this. I love the fresh, springy fabrics you chose too!
Love your fabric choice Terri! So much prettier than the store bought ones.
I’m loving the trim! This is precious! Great tute, Terri!
If I saw you shopping with that tote, I’d be so jealous!! Love, love the fabrics and the tutorial is perfect; clear photos and simple instructions – just right!
Once agin you have done a really good job. Just love it. Everyone needs a couple bags of some sort to carry. Love it. Keep it up.
Thanks for the tutorial. I’ll have to give it a try one of these days, after I finish everything else on my list. Yikes!
Oh, I wish I had a sewing machine, I would try this! I’m not very good at sewing stuff, but this looks easy enough.
Super cute~Super easy! Nice tutorial. I love the fabrics you chose. Happy Easter!
Nice tutorial, and cute bag!
I also use WordPress and can help you with the PDF upload, if you’d like. In Site Admin, click Media, then click Add New. Locate your PDF and upload it. Once it’s uploaded, you’ll go to a page that lists the file name, type and upload date. You can fill in the title, caption and description if you like. Below that is the URL. Highlight and copy it. Now just paste that in your post like you would any other link.
great tote. It would be great for flea market runs, farmers markets, etc…. you made it look so easy. thank you
Thanks for all the pictures with your instructions. Saving this for a later date!
Excellent tutorial! Easy to follow with lots of pictures.
Hey! Congratulations, you Sis Boom Big Shot, you!
joan
Great tutorial Terri! Very easy to follow, thanks so much for taking the time to include one! Love the fabrics that you used as well!
What a pretty bag! And a great how-to!
How cool that you can turn your post into a PDF! Love this tutorial so much that I might have to whip up a couple bags sometime. I think you can never have too many bags! Thanks for putting this together so that it’s so much easier for the rest of us!
Dearest Terri, this is such a wonderful tutorial! Very detail instruction and photos…easy to follow too! That bag is gorgeous and i am so inspired to create one for myself. 🙂 Love to you!
Thank you so much for this tutorial! A thousand times thank you. I made 8 this past weekend. I plan to make 10 more for a total of 18 to give to the local battered womens’ shelter. They are filled to capacity and I thought this would be a nice touch in case they had to leave quickly. Plus and a big plus it helps me get rid of some of my stash! I have been using up some fabrics and some upholstery fabric I have found at thrift shops. I sew a red heart shaped button on the inside for a special heart filled touch. Kids bags may be next. Again thank you! =^..^=
this is a great tutorial! Tote bags are essential and we always need one more. I always have a hard time remembering that the inside lining has to be turn inside out and the outside bag has to be sewn inside of it and then pushed through the hole. I feel so stupid because I know that how it’s done, but when I get to that part I forget and then stare at my unfinished work for like 10 minutes trying to figure it out. silly me!
now i will keep this tutorial at hand for next time. I have several tote bags in mind so it will be of great use, for sure. and i will think of you while doing them!!!
thanks!
Oh wow Terri – just made one!
Was struggling trying to figure it out by myself so after much unpicking I remembered you had mentioned your tutorials so thought – hmmmm, wonder if Terri has done a tutorial on a bag? First one I clicked on :0))
I’ll be blogging it tomorrow and linking to your tutorial if that’s ok – thank you so so much for the clear instructions and step by step photos – my first ever bag – yeay – after owning a sewing machine for 16 years rofl.
Hugs
Shell xx
Great work! Love the tote! I hope many people make them too!