I found this fabulous tutorial for portable cushions on the Sew, Mama, Sew blog, and instantly knew I had the right fabric in my stash and the right sewing skills to make this project.
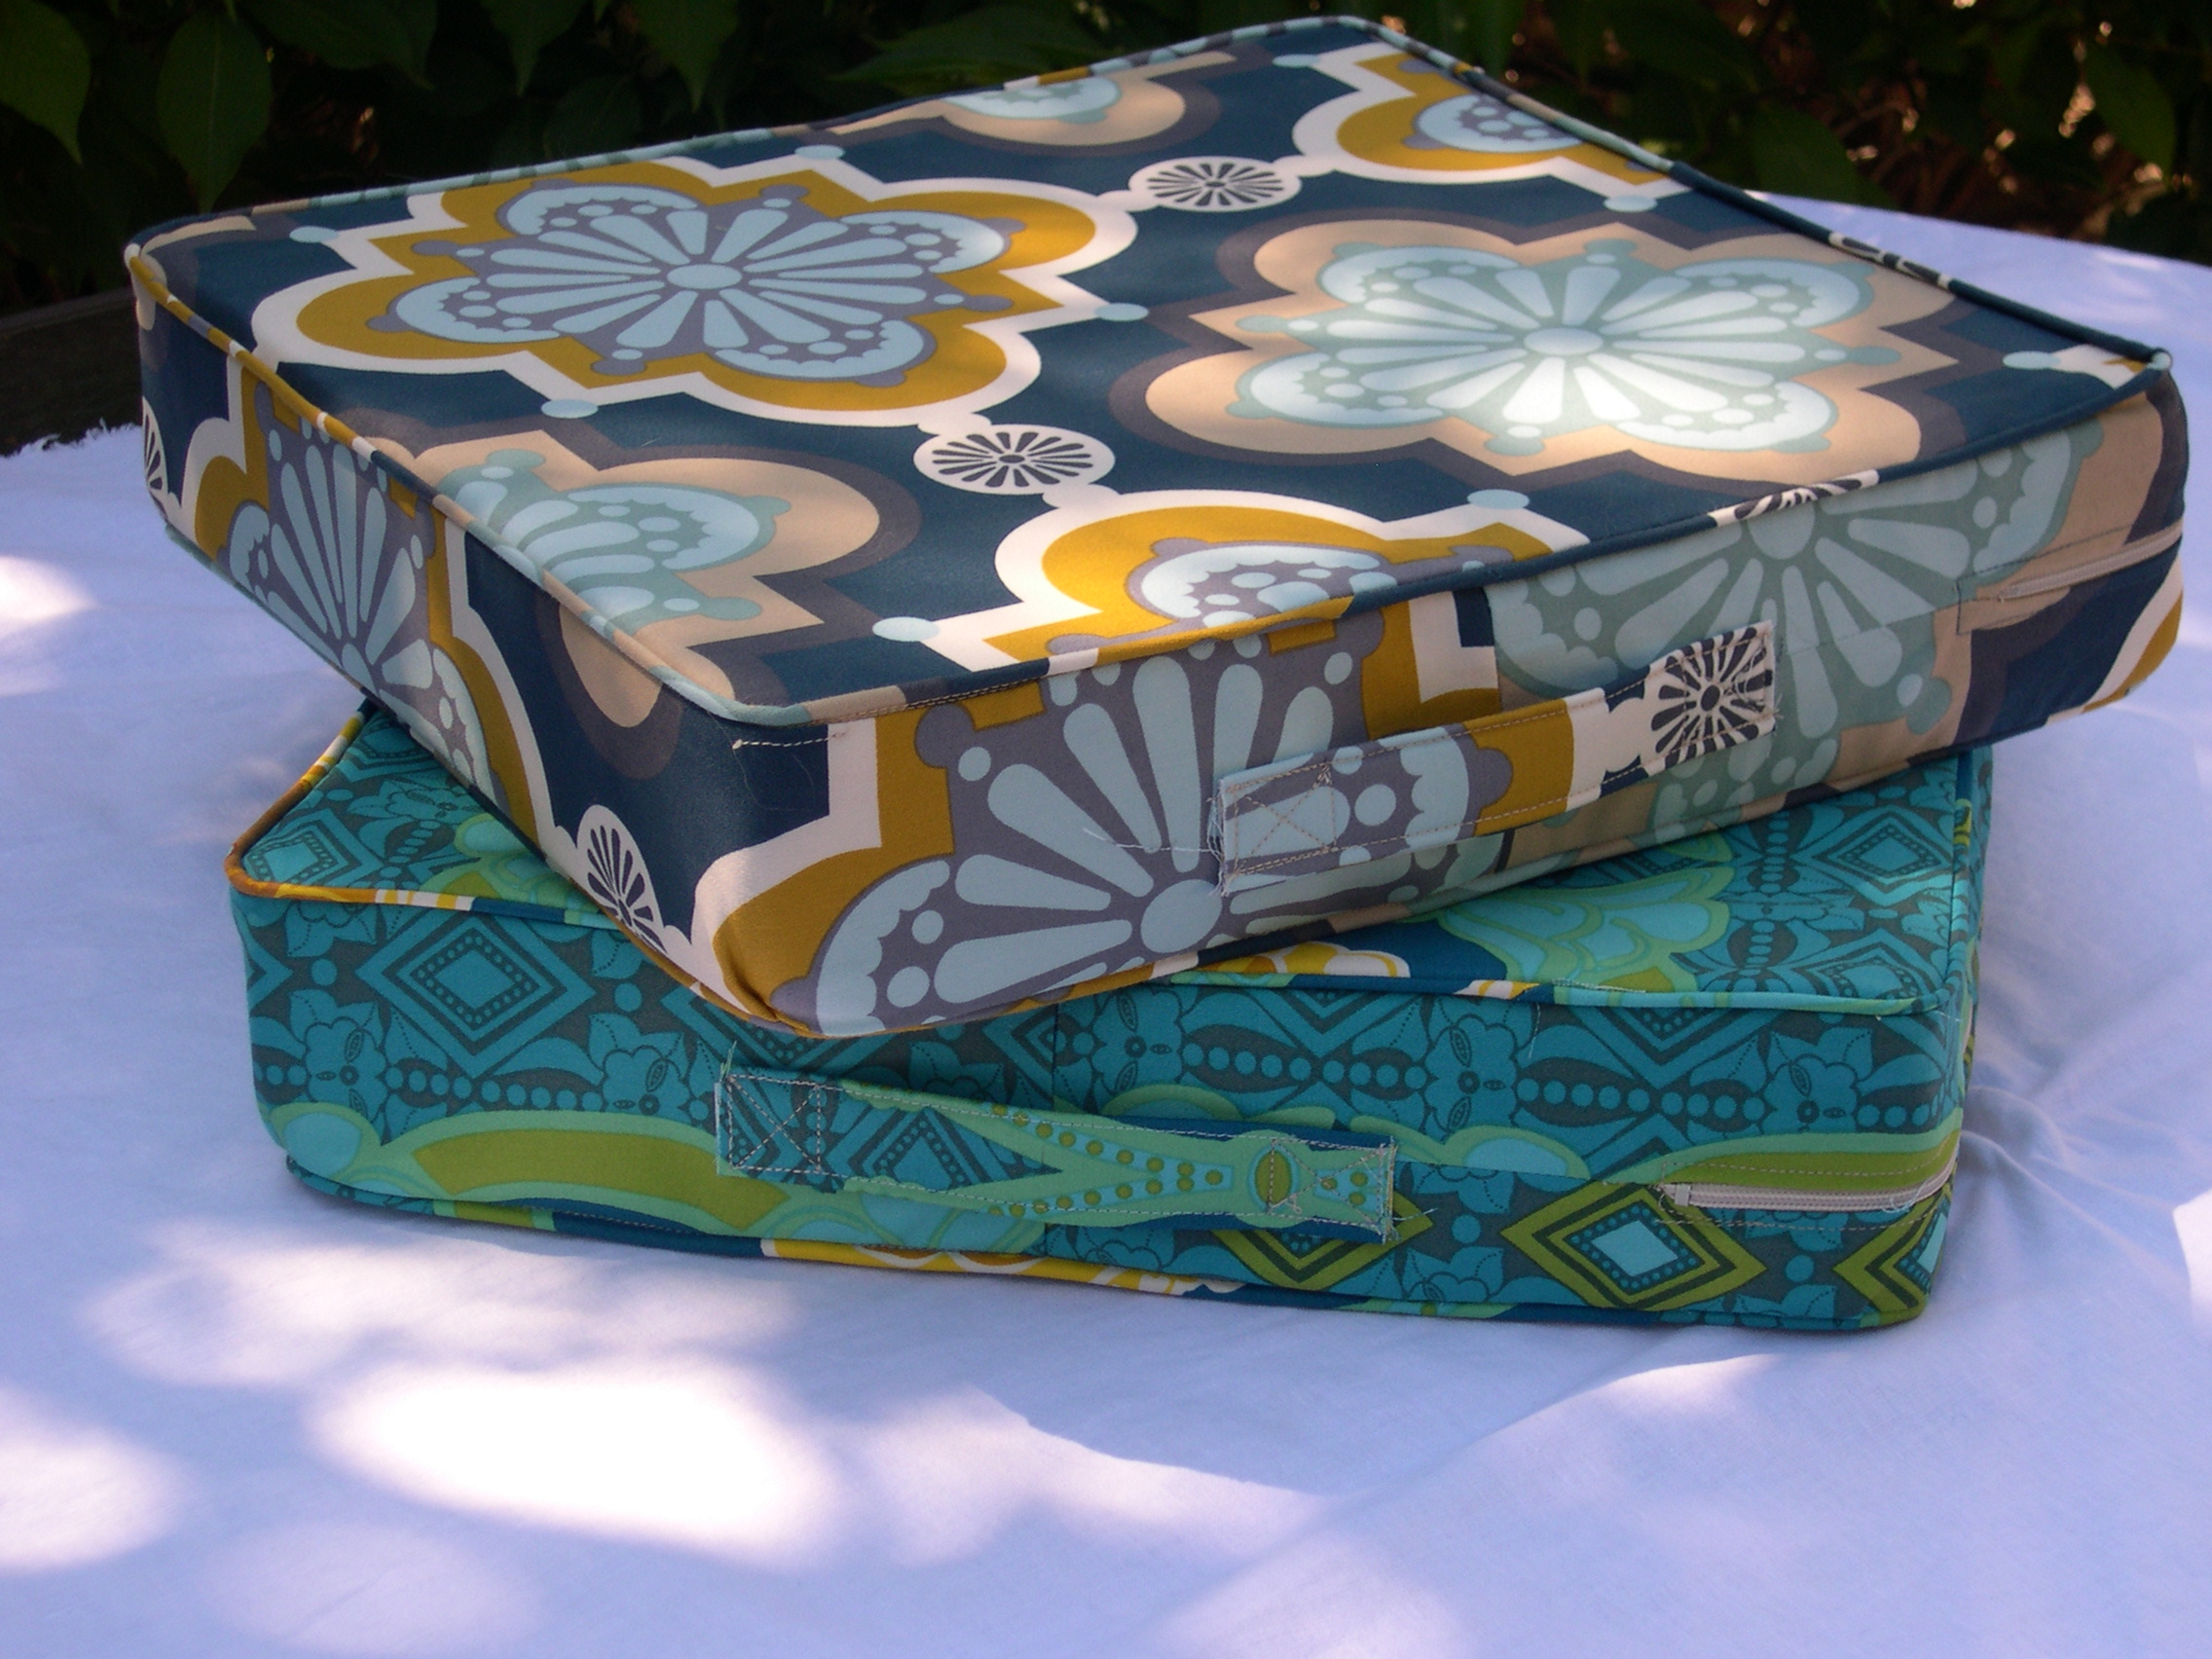
From the Drawing Room fabric collection, I used the Pressed Flowers fabric in teal and the Trellis fabric also in teal. I bought 20″ zippers in a natural color, a piece of 3″ thick foam that I cut into two 15-1/4″ pieces, and about 10 yards of cording for the piping.
Overall, the tutorial was easy to follow. Here are a few comments on the pattern:
*The section on cutting bias tape was quite helpful. Make sure to follow these steps exactly. It really was amazing how this bias strip worked out.
*Making the piping was much more fun that I thought. Definitely need a zipper foot to make the piping tight and smooth.
*I messed up the zipper part where you attach the zipper to the gusset but I made it work in the end. I attached the zipper to each piece of gusset fabric/zipper panels, then I got stuck. I looked in one of my sewing books (Sew & Stow by Betty Oppenheimer) to try to figure out what I did wrong. After staring at the directions for the cozy cushion cover instructions in that book, I figured it out. What you’re supposed to do is put the zipper panels right sides together, sew a short distances to the marks you made earlier where the zipper will start and stop, baste all the way down to the next mark, and sew to the end. Thus, basting the zipper panels to each other, but not including the zipper yet. Then, iron the seam allowance down/open. Adding the fusible tape seemed a little putsy to me, but I know it will hold that extra fabric down. Then sew the zipper to each side of the zipper panels (aligned between those marks you made), and open the basting stitching on the front. Maybe this part wasn’t a problem for others, but I got confused. I’m over it now.
*The handles were easy, but I had to leave the raw edges showing, since I couldn’t fold over the ends – too much bulk (four layers of fabric and a layer of interfacing, doubled when folded over). I tried trimming the interfacing off the ends but I had already fused it to the fabric. No big deal. I think it still looks cool.
Even though I did get stuck once or twice on the instructions, normal for the first time using a new pattern, I would highly recommend making these!

I love having handles on each side of the cushion,
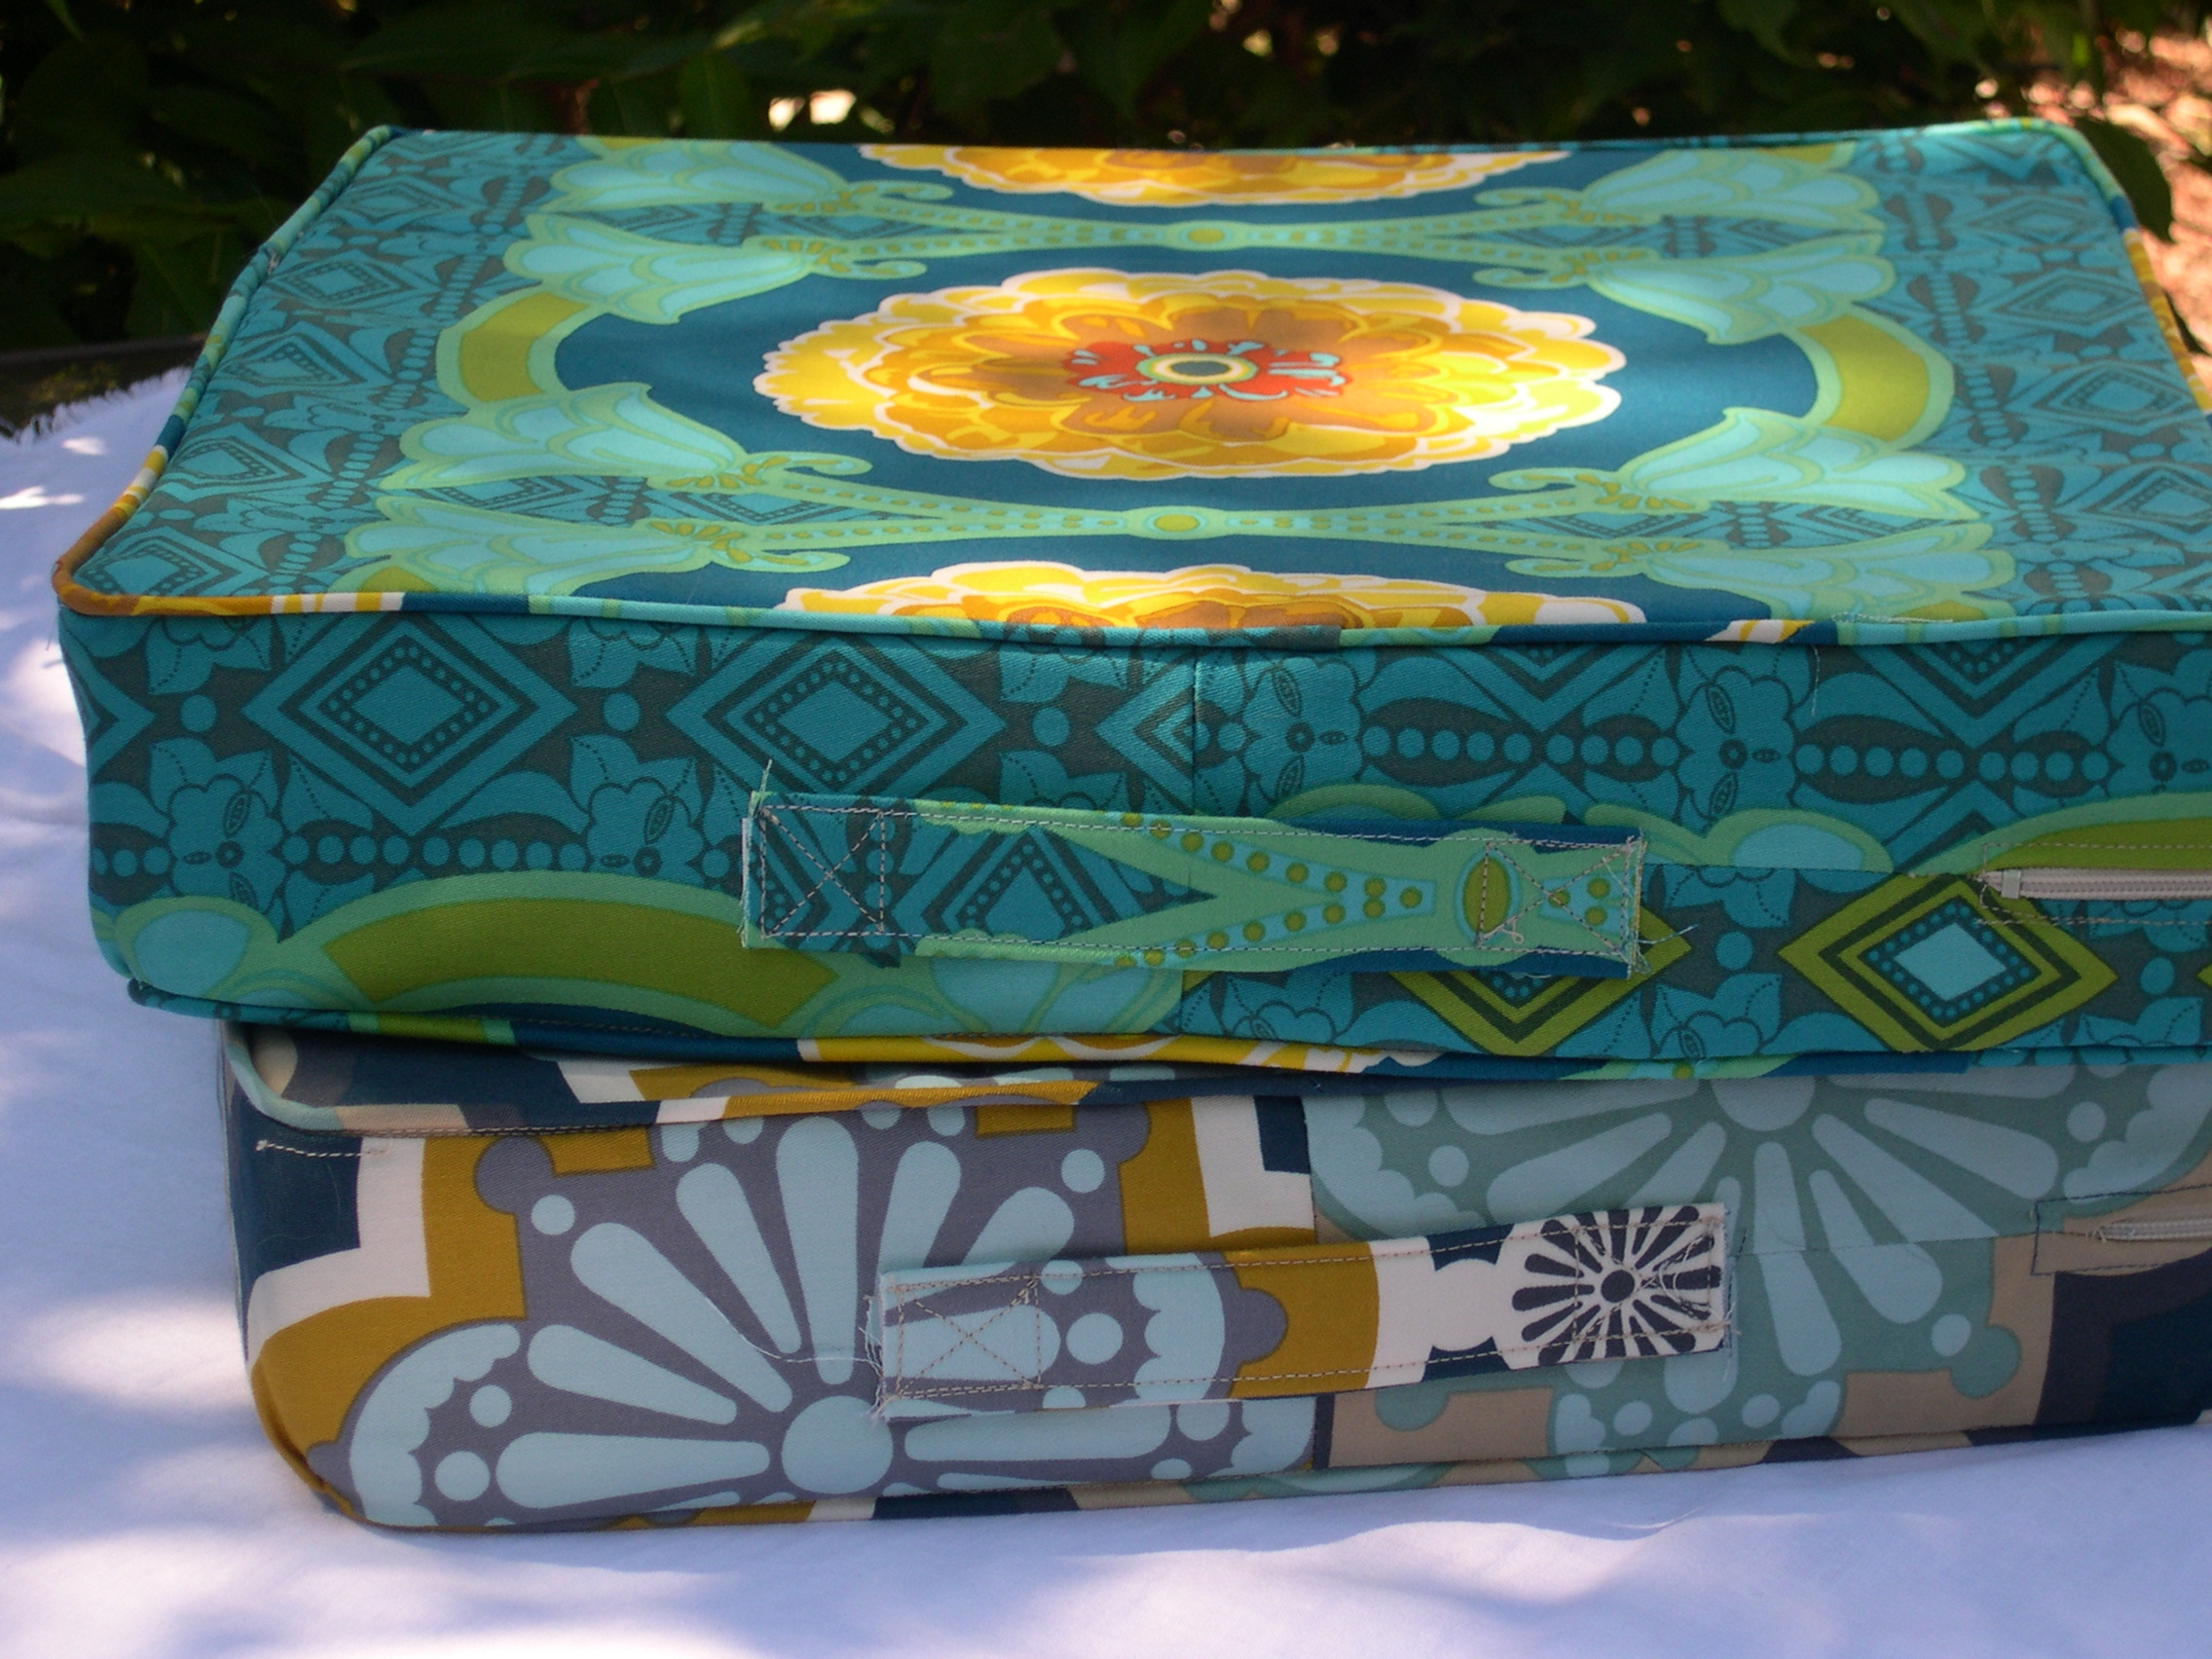
making them portable to carry wherever you go, your backyard, the park, the beach, a tailgate party, wherever. I love them so much I just carry them around the house! (I secretly wish I could take them to a show-and-tell, so thank you for indulging me.) Mostly, I use them on my Adirondack chair.

The zipper on one the side allows for easy removal to clean the cover or replace the foam cushion as it wears out.

I have four yards of the Shadow fabric in Teal, so I will be making more of these. Next up, a cushion for this bench my brother made.

Did I mention that I love these cushions?!

Hi Terri,
I love your cushions, too! Not only is the fabric beautiful, but your workmanship is lovely. You go, girl!
Cassie
Wow, those are beautiful! I love the fabric you chose!
You did such a great job! I was pleased to read your post, as this tutorial is next on my list. I have some Joel Dewberry home dec fabric that I’m planning to use. I can only hope that mine turn out half as nice as yours! (I’ve never made piping before…)
very fun.
thanks for the inspiration.
🙂